
Our Location
304 North Cardinal St.
Dorchester Center, MA 02124

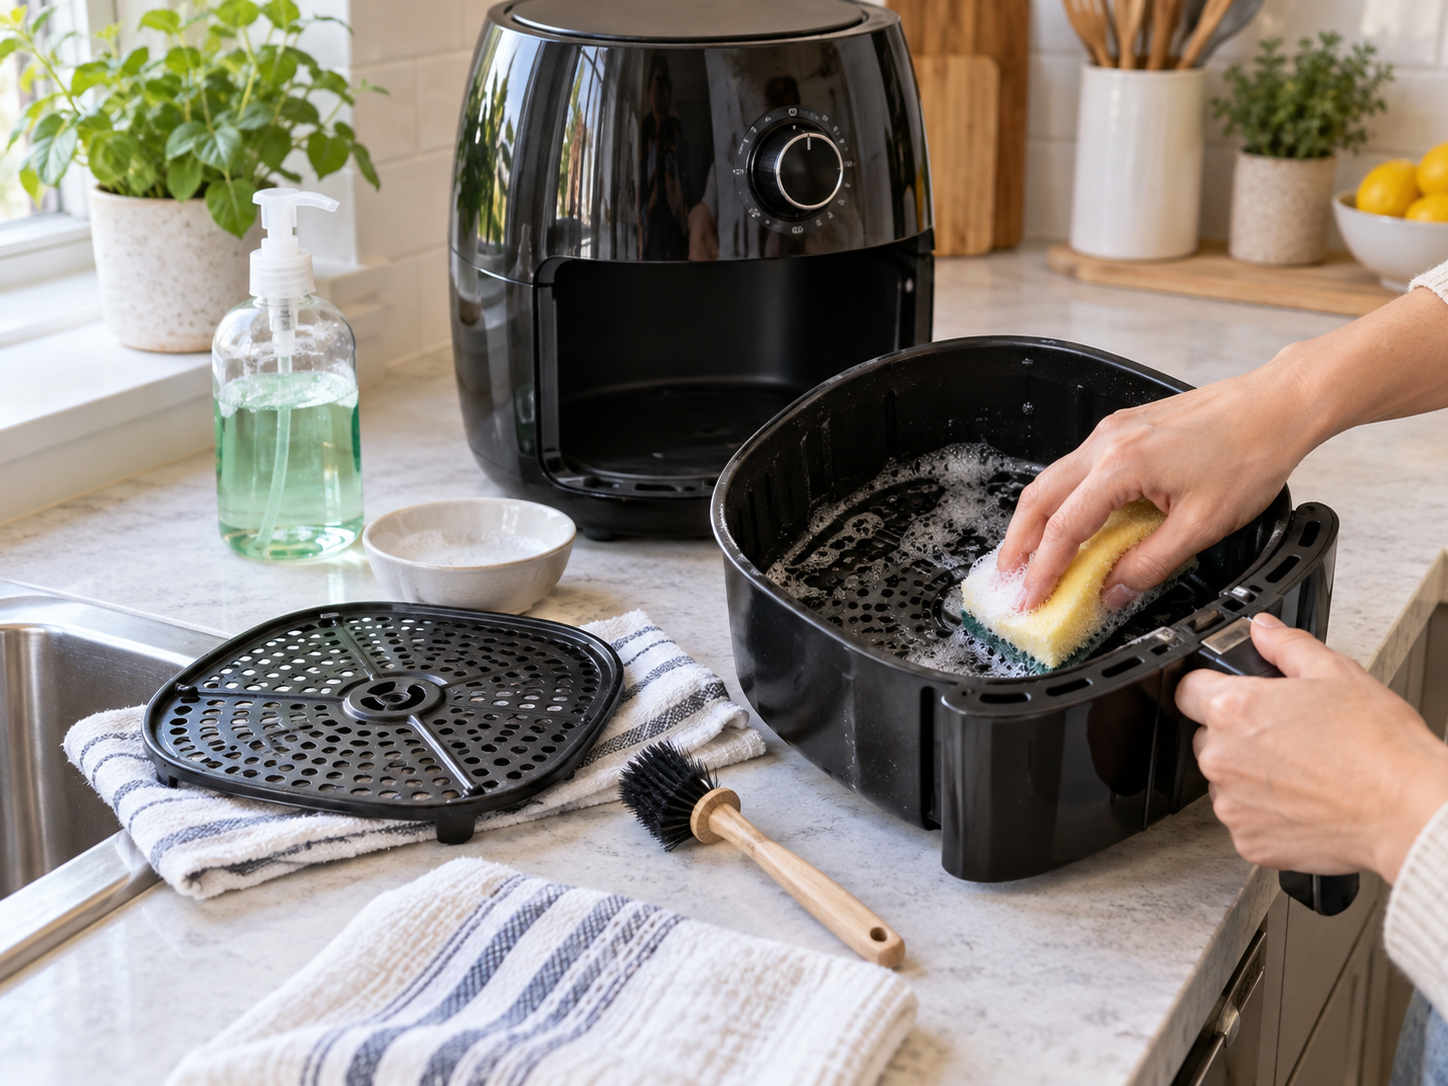
Knowing how to clean an air fryer means removing three deposits: loose crumbs in the drawer, an oil film across the basket, and baked-on grease on the heating element. Each deposit sits on a different surface, and each surface tolerates a different amount of water, scrubbing pressure, and detergent during a single cleaning pass.
Cleaning an air fryer covers the basket, the crisper plate, the drawer, the interior walls, and the heating element above the food. The basket and the crisper plate lift out of the unit for washing, while the interior walls and the element stay in place and accept only a damp cloth.
Cleaning frequency follows the food rather than the calendar, and a batch of frozen fries leaves far less residue than a tray of marinated wings cooked at the same temperature. Grease left on the element burns during the next cycle, which produces smoke, a sharp odour, and a stale taste in every batch cooked after it.
This article defines the deposits forming inside an air fryer, the parts needing a wash after every batch, the methods removing grease, the products damaging a coating, the odour and smoke faults, and the selection traits behind faster cleaning.
Cleaning an air fryer involves four separate tasks: emptying the drawer, washing the basket and crisper plate, wiping the interior walls, and degreasing the heating element above them. The first three tasks belong to a routine pass after every batch, which typically takes 4 to 6 minutes at the sink with warm water and mild detergent.
Degreasing the element belongs to a deep pass every 1 to 2 weeks, since splattered oil reaches the coil from below and bakes onto it at 375 degrees within 2 or 3 batches. Splitting the work into a routine pass and a deep pass prevents the buildup behind a long 30-minute rescue clean of the oil film left after every use.
An air fryer needs cleaning after every use because hot air drives vaporised fat onto the basket, the drawer walls, and the element within a single 20-minute cycle. This film measures a fraction of a millimetre after one batch of chicken thighs, and the deposit hardens into a brown varnish across the same surfaces after 5 or 6 uncleaned batches.
Residue left in place changes the next batch, since old fat carries the smell of the previous food and smokes at a lower temperature than fresh oil does. Wiping the basket while the unit stays warm removes the film in one pass of 30 seconds, and the way grease builds up inside an air fryer explains the cost of skipping it.
Grease builds up inside an air fryer when fat renders out of the food, vaporises in the 350-degree airstream, and condenses on every surface cooler than the coil. The fan turns the chamber over roughly 10 times a minute, which spreads the fat aerosol across the walls, the drawer lip, and the underside of the heating element.
Deposits harden through polymerisation, a reaction turning liquid fat into a resin after repeated heating above 300 degrees, rather than simply drying on the surface as water does. Removing the film before it polymerises keeps the work to a single 2-minute wipe, while a deep fryer handles the same fat load through an entirely different cleaning routine.
Air fryer cleaning differs from deep fryer cleaning in oil volume, since an air fryer holds 1 to 2 teaspoons where a deep fryer holds 3 to 4 quarts. A deep fryer routine centres on filtering and replacing the oil bath, which a household typically repeats after 8 to 10 uses rather than after every single batch.
An air fryer routine centres on surfaces instead, and the grease sits as a thin film on a non-stick basket unable to tolerate a metal scouring pad. Treating the two appliances the same way damages a coated basket, and the parts of an air fryer needing a wash each carry their own tolerance for water.
Six air fryer parts need cleaning: the basket, the crisper plate, the drawer, the interior walls, the heating element, and the exterior housing with its rear vents. These first three parts lift out of the unit and accept full immersion, while the last three stay attached to the electrical assembly and accept only a damp cloth.
Basket-style and oven-style models divide the parts differently, and an oven-style unit adds 3 more removable items: racks, a glass door, and a rotisserie shaft. Sorting the parts by immersion tolerance before starting prevents water reaching the fan motor, and the air fryer basket carries the heaviest residue of the six.
The air fryer basket holds the food and collects the densest oil film, which covers the perforated floor, the side walls, and the handle joint after each batch. A basket washed within 10 minutes of cooking releases its residue under a soft sponge, while a basket left overnight typically needs a 15-minute soak in warm water.
Non-stick baskets tolerate mild detergent and a nylon brush, and the coating loses its release properties under abrasive powders or steel wool at any water temperature. Drying the basket fully before it returns to the drawer prevents rust at the rivets within 6 months, and the crisper plate beneath it traps residue in its own pattern.
The air fryer crisper plate sits on the basket floor and carries grease on both faces, because food rests above it while rendered fat drains through its perforations. Perforations trap crumbs at their edges, which a nylon brush clears in 30 seconds and a flat sponge generally misses on the underside of the plate.
Plates with raised feet expose the lower face to the drawer, so the oil collecting there hardens faster than the thinner film on the upper surface. Lifting the plate out at the start of every wash reveals the residue underneath in 5 seconds, and the drawer below it holds the oil the plate lets through.
The air fryer drawer catches the oil draining past the crisper plate, and a batch of chicken wings typically leaves 2 to 3 teaspoons of liquid fat behind. Liquid fat pours out while it stays warm, which removes most of the deposit before it cools into a sticky layer across the drawer floor.
Oven-style models use a shallow drip tray instead of a drawer, and the shallow tray slides out from beneath the racks for the same warm-water wash. Pouring the fat into a jar rather than the sink prevents a blocked drain, and the heating element above the food carries the residue no drawer catches.
The air fryer heating element sits directly above the basket and collects splattered fat on its underside, which burns during the next cycle and produces visible smoke. These elements accept a damp cloth and a soft brush, and the assembly cannot be immersed or sprayed because water reaching the wiring damages the unit permanently.
Baked-on deposits release under a paste of baking soda and water, left on the coil for 15 minutes and wiped away afterwards with a barely damp cloth. Inverting the unit over a sink for 30 seconds lets loose crumbs fall clear of the coil, and the interior walls around it hold a thinner version of the same film.
The air fryer interior walls hold a thin grease film condensing out of the airstream, and the film covers the fan housing and the upper corners of the chamber. A cloth dampened with warm soapy water clears the film in 2 minutes, and dried deposits typically need the same baking soda paste used on the element above.
Walls of a basket-style unit stay out of reach until the drawer comes out, and an oven-style cavity opens fully once the racks and the door glass come away. Wiping the walls before the next use stops old fat from flavouring fresh food, and the exterior housing and its vents collect a different kind of soil.
The air fryer exterior collects airborne kitchen grease and fingerprints, while the rear vents gather dust restricting the airflow the fan depends on inside the chamber. A damp microfibre cloth removes both deposits from a plastic or stainless shell, and a dry brush clears the vent grille without pushing loose dust into the motor.
These blocked vents raise the internal temperature and shorten fan bearing life, which shows up as a louder cycle long before the unit stops heating food properly. Clearing the vents monthly keeps airflow at its rated volume, and the cleaning methods available for the basket differ in time, residue removed, and frequency.
Air fryer cleaning methods divide into four approaches: a warm wipe, a soapy soak, a baking soda paste, and a short steam cycle run inside the basket. Each method targets a different residue stage, and the table below lists the active time each one takes, the residue it removes, and the frequency each method suits.
A warm wipe handles fresh film at 2 minutes of work, and a paste handles the polymerised deposits a soak cannot lift after several weeks of uncleaned batches. Reading the time column first prevents a 20-minute method on a 2-minute problem, and the hand wash sits at the base of every routine listed in the table.
| Cleaning method | Active time | Residue removed | Suggested frequency |
|---|---|---|---|
| Warm wipe | 2 minutes | Fresh oil film | After every batch |
| Soapy soak | 15 minutes | Stuck-on food | Weekly |
| Baking soda paste | 20 minutes | Baked-on grease | Every 1 to 2 weeks |
| Steam cycle | 10 minutes | Softened grease and odour | Monthly |
Hand washing an air fryer basket runs in four steps: emptying the crumbs, soaking in warm soapy water, wiping with a soft sponge, and drying with a cloth. Water at 40 to 50 degrees Celsius loosens fat faster than cold water does, which shortens the sponge work to a single pass across the perforated floor.
Baskets holding baked-on sugar from a barbecue glaze need a longer soak, and 20 minutes typically releases a glaze left firmly in place by 5 minutes of soaking. Washing by hand protects the coating dulled by dishwasher detergent over 20 or 30 cycles, and the dishwasher question turns on how a basket surface handles alkaline detergent.
Most air fryer baskets carry a dishwasher-safe label, and the manuals granting it still recommend hand washing to protect the non-stick coating across the appliance’s life. Dishwasher detergent runs alkaline at a pH near 11, which strips the oil keeping a non-stick surface releasing food and dulls the finish within months.
Stainless steel and ceramic baskets tolerate the cycle without that loss, so an uncoated basket can go in the dishwasher on any standard programme at full temperature. Checking the basket material before loading the rack prevents a dulled coating, and a baking soda paste handles the deposits a machine cycle leaves behind.
A baking soda paste on an air fryer basket mixes 2 tablespoons of baking soda with 1 tablespoon of water, which forms a mildly abrasive layer that lifts baked-on grease. The paste sits on the deposit for 15 to 20 minutes, and the carbonate particles break the bond between the hardened resin and the coating without cutting into it.
Adding a spray of degreasing dish soap often raises the paste’s effect on heavy deposits, and hydrogen peroxide adds an oxidising step that lightens the brown staining around the rivets. Rinsing every trace of paste away prevents a white residue at the next heating, and a steam cycle reaches the deposits a paste cannot touch inside the chamber.
A steam cycle cleans an air fryer by softening grease rather than removing it, which turns a scrubbing job into a single wipe across the interior walls. The cycle heats a quarter cup of water with a drop of dish soap in the basket for 10 minutes at 150 degrees Celsius, and the vapour condenses on the walls.
This vapour reaches the fan housing and the element from below, which no cloth can access while the whole assembly stays in place inside the unit. Running a steam cycle before wiping usually cuts the work on stubborn deposits, and the fan and heating element still need a safe approach with no standing water.
Cleaning an air fryer fan and heating element safely starts with unplugging the unit, since the coil holds enough heat to burn skin for several minutes after a cycle. The unit then turns upside down over a sink, which brings the element within reach of a cloth and lets loose crumbs fall clear of the fan blades.
Fan blades behind the guard accept a dry brush only, so a wet cloth pushed through the guard can leave water inside the motor housing beneath the blades. Confirming that every surface reads dry before reassembly prevents a short at the next start, and the supplies used on these parts decide how much risk remains.
Cleaning supplies that suit an air fryer include a soft sponge, a nylon brush, a microfibre cloth, mild dish soap, baking soda, and white vinegar for odour work. Each item works on a coated surface without cutting into it, and the softest tool that clears the deposit is generally the correct choice for a basket.
Wooden or silicone scrapers often remove hardened crumbs from a perforated plate, so the basket floor survives a job that a metal blade scores in a single pass. Keeping a dedicated sponge for the appliance prevents grit transferring from other pans, and several common cleaning products damage an air fryer on first contact.
Cleaning products that damage an air fryer include oven cleaner, bleach, abrasive powders, steel wool, and any spray applied directly to the element or the control panel. Caustic oven cleaners attack the non-stick layer and the aluminium beneath it, leaving a dull grey surface that food sticks to at every cooking temperature.
These aerosol sprays carry solvent into the vents and the switch housing, and residue left in those spaces can bake onto the coil during the next cooking cycle. Restricting the product list to soap, baking soda, and vinegar protects both the coating and the wiring, and cleaning frequency decides how much either one must do.
An air fryer should be cleaned after every batch at the basket and drawer, and every 1 to 2 weeks at the element, the walls, and the fan guard. Frequency tracks fat content rather than batch count, and bacon or chicken wings load the chamber far faster than frozen fries at the same 400-degree setting.
Households cooking twice a day generally reach the deep-clean threshold in 5 or 6 days, while a weekend-only routine typically holds for a month between two paste cleans. Logging the deep clean on a kitchen calendar every 10 days prevents the drift that ends in baked deposits, and a burnt smell after cleaning points to residue no wash reached.
An air fryer smells burnt after cleaning when grease remains on a surface the wash missed, and the element, the fan guard, and the drawer rails hide most of it. Detergent left in the basket adds an odour of its own, which the first heating cycle drives into the food as a soapy edge on the crust.
This trapped moisture produces a second odour, a stale note that develops when a damp basket returns to a closed drawer for several days between batches. Running the empty unit at 400 degrees for 5 minutes burns off trace detergent, and the odour that survives that cycle needs a direct removal method.
Removing odour from an air fryer starts with a lemon-water steam cycle, which heats half a cup of water and 2 lemon slices in the basket for 10 minutes. Citric acid in the vapour breaks down the odour compounds bound to the grease film, and the steam softens any hardened deposit the earlier wash left behind.
A dish of baking soda left in the closed drawer overnight typically absorbs what the steam releases, so strong smells from fish or garlic clear without a second full wash. Repeating the steam cycle after the strongest-smelling foods keeps the chamber neutral, and smoke during cooking signals a heavier deposit than odour alone ever indicates.
An air fryer smokes during cooking when fat on the element or in the drawer reaches its smoke point, which sits near 375 degrees for most rendered animal fat. Fatty foods produce the same effect without old residue, since bacon and marbled beef release more fat than the drawer can hold below the basket floor.
Water in the drawer lowers the temperature of that fat, and 2 tablespoons under the crisper plate typically stops the smoke from a full tray of wings. Checking the element for baked residue after any smoking cycle prevents a repeat within 2 or 3 batches, and drying every part properly closes the routine that a smoking cycle interrupts.
An air fryer takes 20 to 30 minutes to air dry at room temperature, and a towel pass at the rivets and handle joints cuts that time to 5 minutes. Perforated plates and mesh baskets hold water at their edges, which a 2-minute run of the empty unit at 200 degrees clears from every perforation.
Assembling a damp unit traps moisture against metal, and that moisture produces rust at the rivets and a stale odour inside the closed drawer within a few days. Leaving parts on a rack until they read dry to the touch prevents both faults, and several cleaning mistakes cause damage a drying step cannot undo.
Air fryer cleaning mistakes fall into three groups: water reaching the electrical assembly, abrasives cutting the non-stick coating, and long soaks loosening the adhesive under a handle. Water entering the base through the vents reaches the fan motor and the thermostat, which produces intermittent heating long before the unit fails outright at the socket.
These abrasive pads leave scratch lines that food sticks to, and each scratch widens the area where the coating lifts away from the aluminium beneath the surface. Matching the tool to the surface prevents 50-dollar repairs no cleaning routine can reverse, and a scrubbed non-stick coating shows that failure more clearly than any other part.
Scrubbing a non-stick coating with an abrasive pad removes the top layer of the finish, which exposes the primer beneath and ends the release behaviour of the surface. Food then binds to the exposed patch, so the patch grows every time a hard tool passes over it during a wash at the kitchen sink.
Flaking particles pass through the body without absorption, while the bare aluminium beneath reacts with acidic foods and discolours the floor of the basket over time. Replacing a basket once flaking starts costs 30 to 100 dollars against a new appliance, and a short inspection reveals the cleaning condition an air fryer currently has.
Air fryer cleaning condition reduces to three checks: the grease on the heating element, the state of the basket coating, and the standing oil left in the drawer. Each check takes under a minute with the unit unplugged and cool, and the three together explain most odour, smoke, and sticking complaints in a kitchen.
None of the three depends on the model, and a basket-style drawer and an oven-style cavity show the same three signals in the same three places. Recording the three results before the next cook establishes a baseline, and the heating element carries the deposit that causes the most noticeable faults of them.
To check the air fryer heating element for grease, unplug the unit, tip it forward over a sink, and look along the underside of the coil under a light. A clean coil reads matt grey, while a loaded coil carries a brown varnish at the bends where splattered fat collects and bakes during every cooking cycle.
Dark droplets that feel tacky indicate fresh fat, and a hard glassy film indicates polymerised deposits that typically need a baking soda paste and 15 minutes of contact. Wiping the coil every 2 weeks while the deposit stays tacky prevents the harder stage entirely, and the basket coating below it records a different kind of cleaning wear.
To check the air fryer basket coating, hold the empty basket under a light and tilt it until the surface reflects across the floor and the side walls. An intact coating reflects evenly, while scratch lines, dull patches, and exposed metal appear as clear breaks in that reflection across the perforated floor of the basket.
A drop of water shows the same result faster, since water beads on an intact coating and spreads flat across a patch that has lost its finish. Replacing the basket once bare metal appears prevents food sticking across the next 100 batches, and the drawer beneath it shows how much oil the routine leaves behind.
To check the air fryer drawer for standing oil, remove the basket and the crisper plate, then tilt the drawer toward one corner under a kitchen light. Oil that pools in that corner measures the fat a recent batch released, and a teaspoon or more indicates a wash interval that runs too long between batches.
This sticky brown film across the drawer floor indicates repeated heating of that oil, because each cycle drives the residue further toward the polymerised stage described earlier. Pouring the oil out within 5 minutes keeps the surface clear, and the design of an air fryer decides how much of this work a routine needs.
Choosing an air fryer that is easy to clean depends on three traits: a removable crisper plate, a basket with a smooth interior radius, and an accessible heating element. A smooth radius leaves no square corner for grease to collect in, which cuts the sponge work on a routine wash down to a single pass.
Oven-style units open fully and expose both the element and the walls, while basket-style units keep the element fixed above a drawer that limits direct access. Confirming that the basket and the plate carry a dishwasher-safe rating before purchase prevents a routine that depends on hand washing after every single batch.
